
Samuel Clay is a grad student in the schools of design and of engineering at Harvard. He founded NewsBlur, a personal RSS news reader, and Turn Touch, beautiful control for the smart home.
Talk to him @samuelclay.
Samuel Clay is a grad student in the schools of design and of engineering at Harvard. He founded NewsBlur, a personal RSS news reader, and Turn Touch, beautiful control for the smart home.
Talk to him @samuelclay.
We’ve all done it. Our code base has one huge monolithic file, packed full of JavaScript spaghetti. It’s unwieldy, hard-to-debug, and has little to no separation of concerns. It is a nightmare to bring new engineers up to speed.
This blog post is about decomposing NewsBlur’s single-file 8,500 line JavaScript application into its component parts: 8 models, 12 views, 3 routers, 3 collections. This post explores patterns, techniques, and common pitfalls in migrating from vanilla JavaScript to Backbone.js. It covers moving routers, models, and views, and the process used to migrate a living app.
NewsBlur is a free RSS feed reader and is open-source. The benefit of being open-source is that you can see all of the changes I made in this migration by looking through the commit history.
As a bit of background, I worked on Backbone.js in its infancy, when Jeremy Ashkenas and I worked on DocumentCloud’s many open-source projects.
This post was written concurrently with a presentation. Depending on your style, you can either read on or flip through this deck. Both have the same content, but this post expands on every concept in the presentation.
There’s no need to go through the presentation. Just read on for the whole kaboodle.
There are only two libraries you need to be intimately familiar with in order to make the most of your Backbone transition: Underscore.js and Backbone.js. That means not only being comfortable with reading the source code of these two libraries, but also knowing all of the methods exposed so you can reach into your grab-bag of tricks and pull out the appropriate function.
Underscore.js is another DocumentCloud library that makes your code more readable and compact by providing useful functions that massage, filter, and jumble data.
One popular use of Underscore is creating short pipelines that take a large collection of models and filters it based on conditions. That much is easy. But there are other uses that are beneficial to know.
You should be comfortable with all enumerable methods. Think about all of your model collections as reduce-able, filterable, and selectable.
Here are two examples of Underscore.js at work:
// Get ids of all active feeds
_.pluck(this.feeds.select(function(feed) {
    return feed.get('active');
}), 'id');
// Returns: [42, 36, 72, ...]

// Count fetched/unfetched feeds
var counts = this.feeds.reduce(function(counts, feed) {
    if (feed.get('active')) {
        if (!feed.get('not_yet_fetched') || feed.get('has_exception')) {
            counts['fetched_feeds'] += 1;
        } else {
            counts['unfetched_feeds'] += 1;
        }
    }
    return counts;
}, {
    'unfetched_feeds': 0,
    'fetched_feeds': 0
});
// Returns: {'unfetched_feeds': 3, 'fetched_feeds': 42}The star of the show is Backbone.js. The entire backbone.js file is fewer than 1,500 lines long, and that’s with 228/1478 lines of whitespace (15%) and 389/1478 lines of comments (26%).
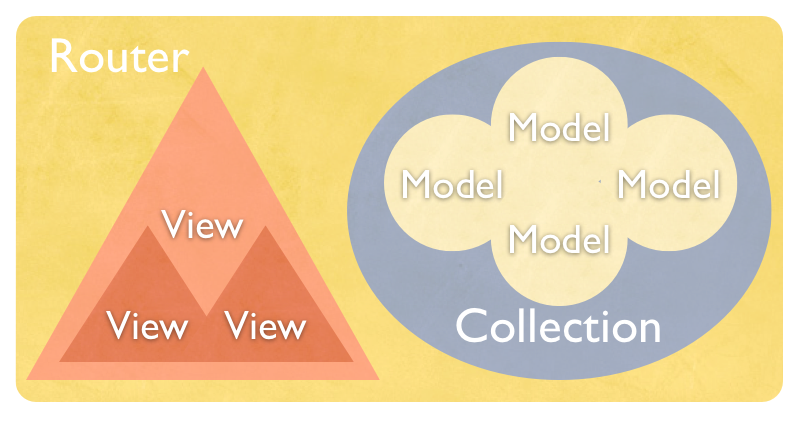
This is a basic example of the layout of the four main classes: models, views, collections, and routers. A fifth meta-class called Events is mixed in to each of these classes.
The first step is no easy task. Take your existing design and visually decompose it into its component views. Each view will be represented by either a single model or a combination of models. In fact, you can even have a view not be backed by a model at all.
Take the NewsBlur UI for example. It’s a standard three-pane view, with feeds, stories, and story detail:

Notice that there are multiple views inside other views. Some views are meant to be simple wrappers around other, more functional views.
On the left there is a list of feeds inside a list of folders. These folders and feeds can be embedded inside each other, creating a recursive structure that can be easily assembled by Backbone.js. Each feed view also contains an unread count, a feed title, a favicon, and a feed menu. All of these views are generated by their respective parents. Your job at this stage is to simply figure out what those views are so you can create the appropriate models, views, and controllers (routers).
Here’s another example, coming from the DocumentCloud workspace, the original Backbone.js site:

A bit simpler than NewsBlur, this is a classic dual-pane view, with an organizer on the left and a detail pane on the right. Notice that there is a view collection, the document list, that holds numerous document views. It’s important to consider each view as granular as possible and then bring them together in collections that are simply views of model collections.
You have routers, even if you don’t realize it yet. Not only that, but you probably have multiple routers. Routers are the smallest part of a Backbone.js project, but are vital because they serve as the entry point for execution.

Anytime a URL is involved, your router should be handling it. You can also have multiple routers in a project. Before version 0.5.0 routers used to be called controllers, if that shines a light on their purpose.
If an out-of-band AJAX call is necessary, and it doesn’t correspond to a specific model, then the router is a great place to put it.
There’s a lot written on conventions for writing your router. I suggest going directly to the source: the original router from the DocumentCloud workspace. This is the first router ever written and should give you as canonical an idea as possible for what your router should and can include.
// Main controller for the journalist workspace. Orchestrates subviews.
dc.controllers.Workspace = Backbone.Router.extend({

  routes : {...},

  // Initializes the workspace, binding it to body.
  initialize : function() {
    this.createSubViews();
    this.renderSubViews();
    Backbone.history.start({
        pushState : true,
        root : dc.account ? '/' : '/public/'
    })
  },

  // Create all of the requisite subviews.
  createSubViews : function() {
    dc.app.paginator  = new dc.ui.Paginator();
    dc.app.navigation = new dc.ui.Navigation();
    dc.app.toolbar    = new dc.ui.Toolbar();
    dc.app.organizer  = new dc.ui.Organizer();
    dc.app.searchBox  = VS.init(this.searchOptions());
    this.sidebar      = new dc.ui.Sidebar();
    this.documentList = new dc.ui.DocumentList();

    if (!dc.account) return;

    dc.app.uploader   = new dc.ui.UploadDialog();
    dc.app.accounts   = new dc.ui.AccountDialog();
  },

  // Render all of the existing subviews and place them in the DOM.
  renderSubViews : function() {
    var content   = $('#content');
    content.append(this.sidebar.render().el);
    content.append(this.panel.render().el);
    dc.app.navigation.render();
    dc.app.hotkeys.initialize();
    this.panel.add('search_box', dc.app.searchBox.render().el);
    this.panel.add('pagination', dc.app.paginator.el);
    this.panel.add('document_list', this.documentList.render().el);

    if (!dc.account) return;

    this.sidebar.add('account_badge', this.accountBadge.render().el);
  }

});
The router is used for laying out all of the workspace-level subviews. Each of these subviews is then responsible for laying out specific instances of documents, collections, toolbar items, search facets, etc.
Before you can even start playing with Backbone models, you’ll need to get your data in a format that Backbone can vivify. Your server should be sending arrays of dictionaries, each array consisting of a single parent model. This may cause versioning on your server end due to having to change the format of your API’s response.
Perhaps you were giving data in a format that made it easy for you to key into the dictionary to retrieve a model, like so:
{
    64: {
        'id': 64,
        'title': "The NewsBlur Blog"
    },
    128: { ... }
}
However, in order to vivify these models, Backbone expects an array of dictionaries. We can modify the backend to provide models in this format, by adding a v=2 query paramter:
[
    {
        'id': 64,
        'title': "The NewsBlur Blog"
    },
    { ... }
]
Backbone reads through and finds all id attributes and hashes them into the _byId
object on the model. You can do this client-side instead of versioning your API, but that would require you to write a custom parse method.
You can then override your collections fetch method to add in the version information. This transparently handles appending a version parameter to your requests.
fetch: function(options) {
    var data = {
        'v': 2
    };

    options = _.extend({
        data: data,
        silent: true
    }, options);
    return Backbone.Collection.prototype.fetch.call(this, options);
},
Notice, by the way, the last line is how you call super() in JavaScript. This is a clear demonstration of over-riding methods in Backbone and then calling super at the appropriate time.
If your models were simple JavaScript object literals (dictionaries), then you were using one of these styles to work with attributes:
// JavaScript:
model.title

model['title']

var attr = 'title';
model[attr]
However, Backbone uses a get method to retrieve an attribute from a model:
// Backbone.js:
model.get('title')
The trick here is that during a large-scale refactor, you want to change as few things as possible. In this case, you can pass a Backbone model’s model.attributes to old Javascript methods. Then when done, clean up by
looking for .attributes.
var iconSrc = $.favicon(socialFeed.attributes);
this.$('.NB-header-icon').attr('src', iconSrc);
This way you do not have to immediately rewrite all of your model attribute getters until you have tested the modified parts of your code.
Looking at feeds and folders above, in order to populate the list of folders you need the feed models. But when populating the feed models, their view is bound to the reset event, which will try to render the feeds, but there are no folders yet!
Pass {silent: true} to the initial reset for feeds, then manually trigger the reset event after the dependencies are met.
Any event that is triggered on a model in a collection will also be triggered on the collection directly, for convenience. This allows you to listen for changes to specific attributes in any model in a collection.
// Bind to all models
Documents.bind('reset',  this.reset);
Documents.bind('add',    this._addDocument);
Documents.bind('remove', this._removeDocument);

// Bind to specific attributes on the collection's models
Documents.bind('change:pages', this._renderPageCount);
The Documents collection contains all of the documents on the page, but you could also create specialized collections with a subset of those models that respond to change events without having to filter the change event on the bigger collection to only apply to those specific models.
In this case, a model is updated from elsewhere, so it needs to be refreshed on the page. Use model.hasChanged() and model.previousAttributes() to see what’s changed.
However, before you may have iterated over all new values and compared to existing values. Backbone has this built in.
// The collection is selective about changing attributes
this.bind('change', this._onModelChanged);
...
_onModelChanged : function(doc) {
    if (doc.hasChanged('access') && doc.isPending())
        this._checkForPending();
},
...
// The view is also selective about changing attributes.
// Re-renders the tile if an server-backed attribute changes.
_onDocumentChange : function() {
    if (this.model.hasChanged('selected')) return;
    this.render();
},
You can short-circuit the change event if you are looking for a specific attribute. But sometimes you want the change event fired only once yet you’re looking to do different things based on which attribute has been changed. So instead of relying on each attribute’s individual change event, you can wait for the bundled change event.
Naturally, you may be wondering what gets fired first? Each individual change event or the bundled change event? Well, to figure that out we just turn to the Backbone.js source code:
// Call this method to manually fire a `"change"` event for this model and
// a `"change:attribute"` event for each changed attribute.
// Calling this will cause all objects observing the model to update.
change: function(options) {
  ...
  for (var i=0, l=triggers.length; i < l; i++) {
    this.trigger('change:' + triggers[i], this,
                 current[triggers[i]], options);
  }
  ...
  this.trigger('change', this, options);
  ...
},
Notice that the individual change attributes are guaranteed to fire before the bundled change event. This goes to show that the source code for Backbone.js is not as thorny and cumbersome to read as other libraries may have led you to believe about all libraries. Backbone.js’s source code is easy to follow and is written as close to plain english as possible
Sometimes an active item needs a bit more meta-data than the non-active counterpart. Take the feed list, for instance. When a feed becomes selected, it needs to be referred to by many other components, each of which needs to know about the active feed. Storing a reference to this model, say ActiveFeed, then allows you to add view-specific meta-data that would be helpful in other views.
NEWSBLUR.Models.Feed.prototype.setSelected = function() {
    NEWSBLUR.app.feeds.deselect();
    NEWSBLUR.app.activeFeed = this;
}

NEWSBLUR.Views.FeedList.prototype.findSelected = function() {
    return _.pluck(NEWSBLUR.app.activeFeed.views, '$el');
}
If you are operating in a loop, then you’ll definitely want to cache a reference to a model like this.
This part of the process is a bit more involved than moving models or simply constructing routers. This is where most of the cleanup is involved.
The first thing that needs to be changed is how DOM fragments are constructed. In NewsBlur’s case, we’re moving from JavaScript element creation to interpolated templates.
This style is simply a wrapper around a variety of document.createElement calls, where $.make will take attributes and add them correctly to the newly created element, as well as appending each of the children in a easy-to-read function.
openSocialCommentReplyForm: function($comment) {
    var profile = this.model.userProfile;
    var $form = $.make('div', { className: '...' }, [
        $.make('img',   { className: '...',   src: profile.get('url') }),
        $.make('div',   { className: '...' }, profile.get('username')),
        $.make('input', { className: '...',   type: 'text' }),
        $.make('div',   { className: '...' }, 'Post')
    ]);
    $('.story-comment-reply-form', $comment).remove();
    $comment.append($form);

    $('.comments', $form).bind('keydown', 'enter, return',
        _.bind(this.saveSocialCommentReply, this, $comment));
    $('.comments', $form).bind('keydown', 'esc', function() {
        $('.NB-story-comment-reply-form', $comment).remove();
    });
    $('input', $form).focus();

    this.fetchStoryLocationsInFeedView();
},
While it’s easy to read and write, it is not fast. This method is an order of magnitude slower than the better methods described below, each of which use string interpolation to inject data into the template.
This is the option that I eventually chose, if only because it was the simplest, could be easily cached by the browser, and was inline with the view code.
render: function() {
    var $feed = $(_.template('\
    <<%= listType %> class="feed">\
      <img class="feed-favicon" src="<%= $.favicon(feed) %>">\
      <span class="feed-title">\
        <%= feed.get("feed_title") %>\
      </span>\
      <div class="feed-exception-icon"></div>\
      <div class="feed-manage-icon"></div>\
    </<%= listType %>>\
    ', {
        feed      : this.model,
        listType  : this.options.type == 'feed' ? 'li' : 'div',
    }));

    this.$el.replaceWith($feed);
    this.setElement($feed);
    this.renderCounts();

    return this;
},
Notice that this.setElement is used on the new $feed. The reason for this is because of listType changing the top-level element depending on the location of the feed. In some cases it’s part of a list, and in other cases it’s a stand-alone feed title. In order to make it semantically correct, different top-level tags are needed, so you can’t just use this.$el.html(), otherwise there will still be a top-most div wrapping your view (which can be customized by setting this.tagName).
Also, note that a better way to create these multi-line strings is to use the heredoc (multiline) strings in CoffeeScript. However, the template string still goes inline, which means you do not have to do any asset pre-compiling, which can be more or less difficult depending on your framework.
These templates are just <script> tags that go in your HTML templates. The downside to this method is that your JavaScript templates are not cached by the browser and have to be downloaded as part of every page load.
<script type="text/html" id="feed-template">
    <<%= listType %> class="feed">
      <img class="feed-favicon" src="<%= $.favicon(feed) %>" />
      <span class="feed-title">
        <%= feed.get("feed_title") %>
      </span>
      <div class="feed-exception-icon"></div>
      <div class="feed-manage-icon"></div>
    </<%= listType %>>
</script>
…
render: function() {
    this.template = this.template || $('#feed-template').html();
    var $feed = _.template(this.template, {
        feed      : this.model,
        listType  : this.options.type == 'feed' ? 'li' : 'div',
    });
    this.$el.replaceWith($feed);
    this.setElement($feed);
    return this;
},
Not recommended, but easy enough to do without a pre-compiler or asset pipeline.
This is the recommended method, but it requires you to have a pre-compiler that works in both development and production, referring to your templates individual in development and as a concatenated file in production. Not a big deal to implement, but many asset packagers do not handle JavaScript templates and allow you to wrap them in the appropriate interpolater, such as Underscore.js’ _.template.
window.JSTs['feed'] = _.template('<script type="text/html" id="feed-template">'+
                                 '<<%= listType %> class="feed"><img class="feed-favicon" '+
                                 'src="<%= $.favicon(feed) %>" /><span class="feed-title">'+
                                 '<%= feed.get("feed_title") %></span>'+
                                 '<div class="feed-exception-icon"></div>'+
                                 '<div class="feed-manage-icon"></div>'+
                                 '</<%= listType %>></script>');
...
render: function() {
    var $feed = JSTs['feed']({
        feed      : this.model,
        listType  : this.options.type == 'feed' ? 'li' : 'div',
    });
    this.$el.replaceWith($feed);
    this.setElement($feed);
    return this;
},
If you are on Ruby on Rails, you can use Jammit, another DocumentCloud project, to automatically handle JavaScript templates. Alternatively, node-jst and sprockets are worth a look.
The most common view change you’ll make is moving from event binding to event delegation.
// From:
$(".feed", $feedList).bind('click', function(e) { ... });

// To:
NEWSBLUR.Views.FeedView = Backbone.View.extend({
    ...
    events: {
        "click" : "open"
    }
    ...
});
One of the biggest benefits you’ll receive by moving to Backbone.js is going from event binding to event delegation. If you’re not already familiar with what this is, it is simply attaching all events to the top-level view element and then bubbling any events that happen to a child element up to the parent, where it is caught and delegated to the appropriate method.
This also means that you won’t have events bound all over the DOM. And when you destroy views, you know where all of the events are bound and will not have as much work to do in order to prevent memory leaks from events bound to missing elements.
Sometimes an object on your page can be better represented by different views attached to the same element.
NEWSBLUR.Views.FeedView = Backbone.View.extend({
    initialize: function() {
        this.menu = new NEWSBLUR.Views.FeedMenuView({el: this.el});
    }
});

NEWSBLUR.Views.FeedMenuView = Backbone.View.extend({
    ...
    events: {
        "click" : "open"
    }
    ...
});
In this case it’s important to remember that both of these views will be listening for bubbling events. That means that it is possible to create a race condition if you do not know the order these views are instantiated. You will want to be careful in that the separated views do not step on each other’s toes.
In this instance the feed title view and the feed menu view are attached at the same place but serve completely different purposes. The feed title view is the “parent” of the menu view, even though they exist at the same level in the DOM hierarchy.
If your top-level element is complicated and you are creating it as part of your render, then you can use setElement instead of $(this.el).html().
var $feed = _.template('<li class="feed"> ... </li>', {
    ...
});

this.setElement($feed);
// Would include a surrounding <div>
// $(this.el).html($feed)
But you can’t just perform a setElement, because you need to replace the $el if it is on the page:
this.$el.replaceWith($feed);
this.setElement($feed);
This is meant for switching between element types. For example, a view that will sometimes go into a list as a list item, but then also be displayed solo, then you will want to control the tagName or just include it as part of your template and use setElement.
Models should not know about views. So in order to keep track of views, a parent view should encapsulate them and store references.
findFeedInFeedList: function(feedId) {
    var $feeds = $('.feed', $feedList).map(function() {
        var dataId = $(this).data('id');
        if (dataId == feedId) {
            return this;
        }
    });

    return $feeds;
}
[turns into a view collection on FeedListView]

This is a typical case where you want to have a recursive subview that can contain more of itself. In this case, we have feeds and folders, and both can be children of folders. To accomplish this hierarchy, we just have to descend down the chain, rendering each subview and keeping track of each child view.
NEWSBLUR.Views.Folder = Backbone.View.extend({
    render: function() {
        var depth = this.options.depth;
        var $feeds = this.collection.map(function(item) {
            if (item.isFeed()) {
                var feed = new NEWSBLUR.Views.Feed({
                    model: item.feed,
                    depth: depth
                }).render();
                item.feed.views.push(feed);
                return feed.el;
            } else {
                var folder = new NEWSBLUR.Views.Folder({
                    model: item,
                    collection: item.folders,
                    depth: depth + 1
                }).render();
                item.folderViews.push(folder);
                return folder.el;
            }
        });

        var $folder = this.renderFolder();
        $(this.el).html($folder);
        this.$('.folder').append($feeds);
        return this;
    }
});When moving from story to story or feed to feed, you want to move in the order of what’s on screen. The order is handled by the collection, but keeping track of the active model is something you have to do manually.
// Go to the next feed. Old style:
$('.feed.selected').next('.next')

// New style:
Feeds.activeFeed = Feeds.next();
Feeds.activeFeed.set('selected', true);
The Feeds.next() method can be a complicated method that walks your recursive hierarchy. But that’s hidden away and you can just call that method idempotently.
Views handle their own actions, but what about cross-view actions? One view modifies another view. Propagate that up to the Router or parent view that is drawing the views. Have the parent talk to the necessary models, changing appropriate data.
Once the data is changed, the correct views will update, based on their triggers and bindings.
For instance, if you are deleting a feed, the context menu view, which knows which $feed is being deleted, sends that info to the model, which then scans its own views and triggers the removal on the correct one. Finally, an AJAX request is made (this is optimistic) in the Router.
NEWSBLUR.Views.FeedMenu = Backbone.View.extend({
    deleteFeed: function() {
        this.model.removeFeedFromFolder(this.folder);
    }
});

NEWSBLUR.Models.Feed = Backbone.Model.extend({
    removeFeedFromFolder: function(folder) {
        this.feedViews.chain().select(function(feedView) {
            return feedView.folder == folder;
        }).each(function(feedView) {
            feedView.animateDestroy();
        });
    }
});
Some views just don’t have models. They control a visual element on the page but have no corresponding server model. The closest object they have to a model is the page itself or the user.
This means you need to keep a reference to the view. You can’t just rely on the model to update the view. Other times you do have a model. If the model for the view would change depending on the model, you can just render a new view with the correct model and replace it on the page.
This error comes from trying to bind to a method that doesn’t exist. But you don’t get the name or line of the error, so the only way to debug it is to set a breakpoint and work your way up the stack.
_.bindAll(this, 'render', 'open', 'methodRemovedAndWillThrowTypeError');Add {silent: true} to a model.set() call if you’re not ready to handle the change events.
Sometimes an attribute change merely results in a changed class on the element, not a full render. One technique you can use is to bind to the bundled change event and then selectively look for attributes that only result in a class change.
onChange: function() {
    var onlyClasses = _.all(_.keys(this.model.changed), function(change) {
        return _.contains(['selected', 'has_exception'], change);
    };

    if (onlyClasses) {
        this.toggleClasses();
        return;
    }

    this.render();
}
Here, we’re checking that every changed attribute is one that results in a class change. Otherwise, do the full render.
When removing a view, you need to both remove it from the DOM and then unbind it. The model still has bindings to the destroyed view.
// Parent view:
view.destroy();

// View:
initialize: function() {
    this.model.bind('change', this.render);
},

destroy: function() {
    this.remove();
    this.model.unbind('change', this.render);
},
This has changed in the latest version of Backbone.js, but it’s not yet released (the coming version 1.0), so you have to manually destroy both the views and view’s event bindings.

Before Backbone, views would not automatically update from beneath you. Now that views are tied to models, check to see if you are modifying a view post-render, just as inserting a special sub-view that the parent view doesn’t know about. Because when the view re-renders, it won’t know to re-insert the subview.
A couple resources that I like are:
As always, make sure to read the source of Backbone.js to see if you can just figure out what’s happening under the hood.
I’m @samuelclay on GitHub, where you can follow me to watch the development of the NewsBlur front-end, back-end, iOS and Android apps. And I’m @samuelclay on Twitter where you can ask me further questions about Backbone.js.